Whether you use disposable or reusable bags, parchment cones or sandwich bags, the decorating bag is a very important part of cookie decorating, and knowing how to use one is critical to your success. Here are some tips for preparing all kinds of bags.
Disposable Bags:
Disposable bags are a great invention! They have the convenient throw-away nature of parchment cones (although they CAN be reused if you wish), and the comfort of a reusable bag.
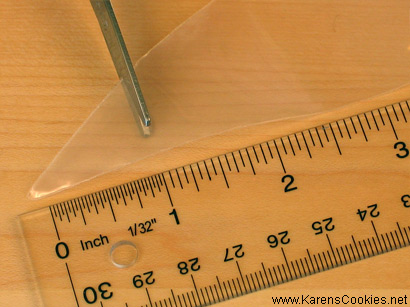
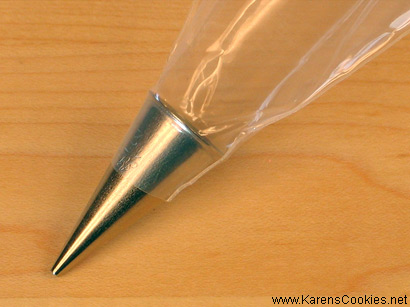
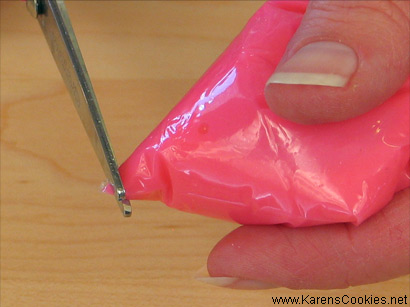
If you will be using your disposable bag without a coupler, you will need to clip about 1 inch from the tip of the bag. Use a ruler the first few times until you can eyeball it-- an inch looks a lot smaller than you think it would when you're dealing with a triangle. Insert decorating tip into the bag pointy side down, and you are ready to fill it with frosting.
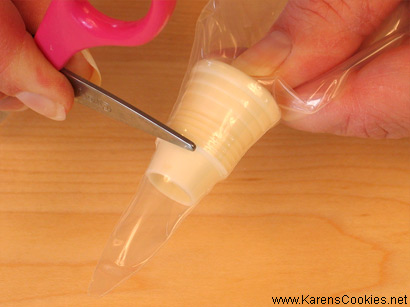
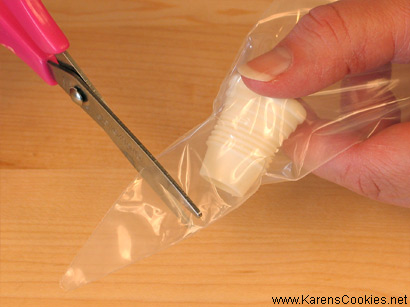
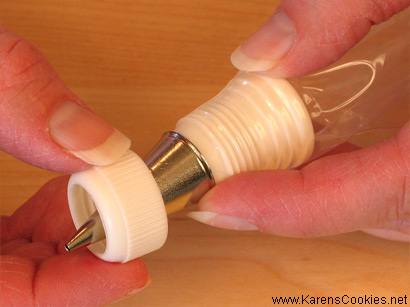
To use a coupler, push the coupler down inside the bag just as far as it will go. Make a mark along the first ridge of the coupler (the one that is closest to the tip of the bag), using scissors, a pen or a thumbnail. Remove the coupler and use scissors to cut the bag where you made your mark. Place coupler back down inside the bag. Now you can put any tip over the end of the coupler, screw on the ring and you're ready to go. Changing tips on the same bag of icing is a breeze when you use a coupler.
Reusable Bags:
Reusable bags are quite similar to disposables when it comes to preparation; however, unless you have a very large tip, you will always need to use a coupler with the reusables. The opening they make at the factory is generally too large for standard sized tips. Follow the instructions above for using a coupler.
IMPORTANT NOTE: You need to be aware that both disposable and reusable bags are very flexible. The opening that you cut for tips and/or couplers can and
will be stretched out as you squeeze the bag. Cut the opening slightly smaller than you think you will need. You can always trim more off, but if you cut it too large the tip or coupler will pop right out and the bag will be useless. Please trim your bags carefully.
Parchment Cones:
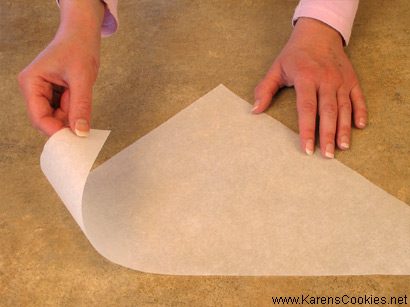
Parchment cones are handy if you need a very small amount of color for a particular cookie. You don't even need to use a tip with the parchment (although you can if you want to). Here is how you fold a parchment triangle into a cone.
1. Place triangle on table with the longest side away from you.
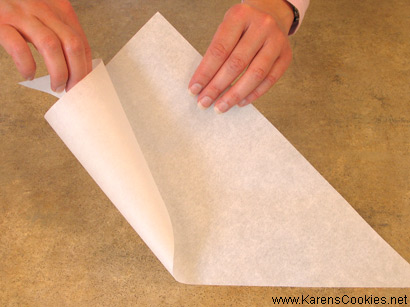
2. Take hold of the right side of the triangle and begin rolling it inward to make a cone.
3. Grab the left point with you opposite hand and fold it over and around the back of the cone.
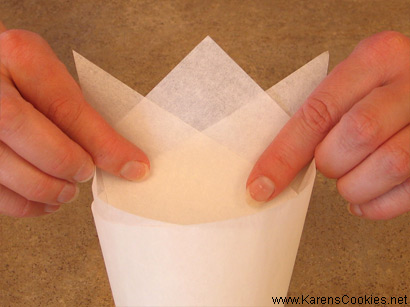
4. The 3 points should make a "W" at the top of the cone.
You may need to use a piece of tape to secure your cone the first few times you make one, but you'll get used to holding it so that it won't come apart on you.
If you would like to use a tip with your cone, you will need to trim the point from the cone.
Drop your tip down inside before filling the bag.
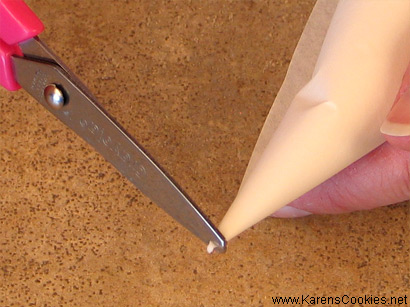
I you do not need a tip, fill the bag first (
see filling tutorial), and then clip off a portion of the tip.
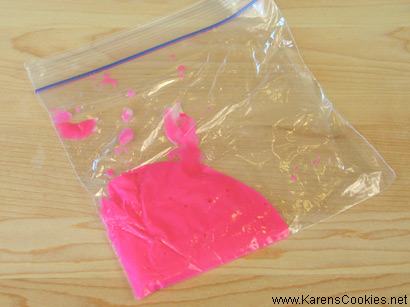
Sandwich Bags:
I know it sounds funny, but zip-top sandwich bags can actually come in quite handy when decorating. The biggest downfall is their lack of strength. I've had many a blowout using these types of bags. Freezer bags are better, but are still not as strong as a disposable decorating bag. BUT, for very thin frosting or glaze, they work quite well. I haven't had any luck using decorating tips with them, so basically all they are good for is a thin line. Just fill the bag with your icing, zip the top, and clip off a corner to squeeze the icing through. Be careful not to cut off too much, or the icing will be difficult to control.