Bake a batch of onesie cookies using one of our
recipes or your own. For every 2 dozen cookies, make a batch of frosting using one of our
frosting recipes.
Mix colors according to chosen designs (see back of card for ideas). Since color combinations are endless, just remember a couple of rules. First, the outlines and piped designs take little frosting, so make smaller amounts of those colors, and larger amounts of the colors that will be used for glaze. Second, for all pastel colors, start with a tiny bit of coloring and add to it until you get the color you want. Add a few drops of Bright White to each color to soften it. For brighter colors, omit the white.
Select the tip sizes you will need for your design and insert them into disposable bags. The tips you need will depend on your desired piped design size. See the chart to the right to determine these sizes. For outlining, I prefer tip #2. Fill the bags with your colored frosting, and close them with rubber bands.
To make glaze, add water to frosting, a few drops at a time, until it is a thin consistency. A drop of glaze should disappear into the mass by 3 or 4 seconds.
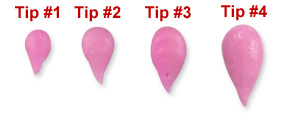
This chart shows approximate relational teardrop sizes using tips #1 - #4.
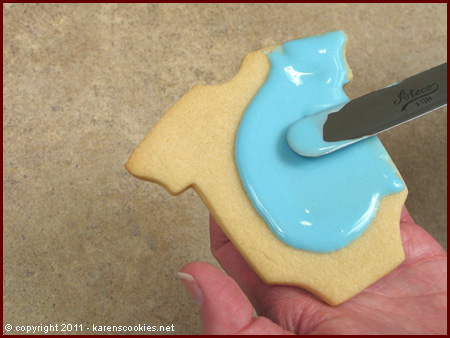
Scoop glaze onto cookie with a spatula. Spread toward edges, adding more as needed, and scraping off any excess. Allow to dry for several hours.
All of the piped designs on this card are made with a series of teardrop shapes.
If you can master the teardrop, you can do any of these designs (and many others!) To make a teardrop, start with your bag at a 45 degree angle, with the tip slightly off the surface. Start squeezing until the round side of the teardrop is the desired size. Gradually release pressure as you pull back toward the tip of the drop. Stop squeezing, pull your bag away, and you're done!
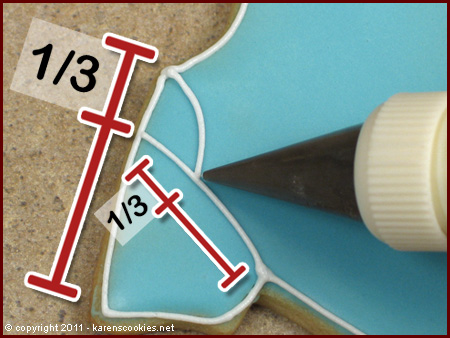
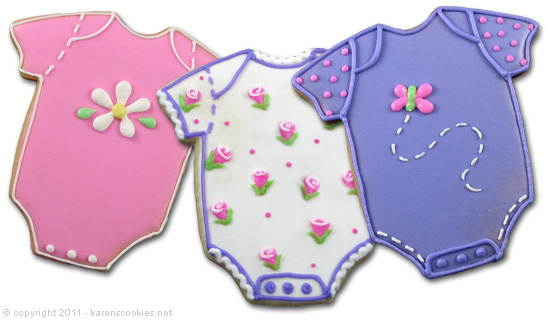
Outline entire cookie with a #2 tip. Then use the illustration above as a guide for piping the seams for the sleeve and shoulder area.
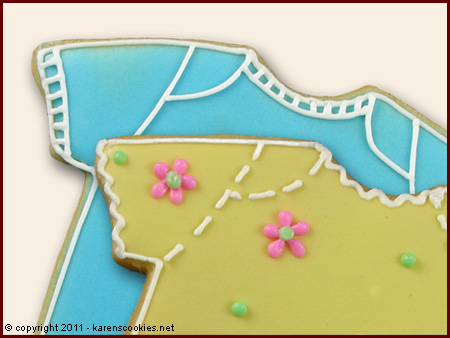
Experiment with the necklines and sleeves to create different looks. Some options include broken lines for stitching, wavy lines for lace, and 'train tracks' for ribbing.
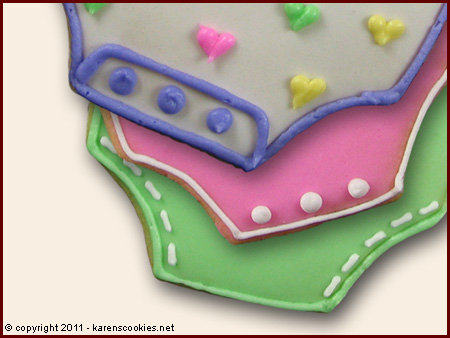
Add different features (such as snaps and/or stitching) to finish the bottom.
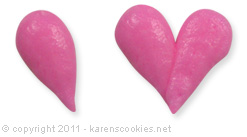
Hearts are two slanted teardrops with tails meeting. First make a right-pointing teardrop, then a left-pointing teardrop next to it.
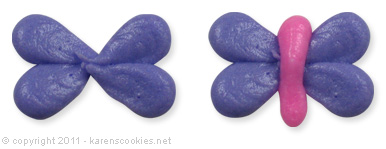
Butterflies are made by piping two hearts, connected as shown. Finish by piping a thick line down the middle with another color.
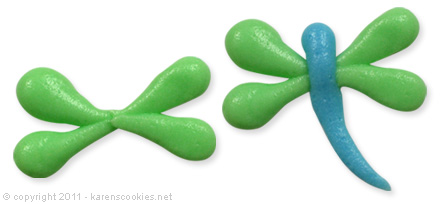
Dragonflies are made just like butterflies, except the teardrop shapes are elongated as shown.
To create the effect of flying, try piping a dotted path behind the bug.
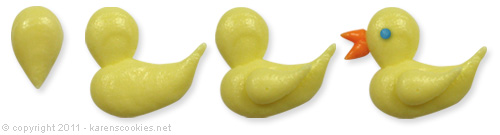
The base of the duck is made with 3 yellow teardrops. Curve the ends of the body and wing upward as shown. Using a smaller tip, pipe a beak with 2 tiny teardrops, and an eye with a small dot.
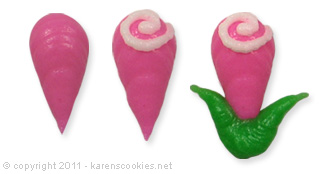
Create cute rose buds by starting with a single teardrop. Follow with a piped swirl on top using tip #1. Finally add leaves by piping two smaller green teardrops.

To create simple flowers, pipe inward-facing teardrops for petals. Then add a large dot in the center, overlapping the tails. You can also add a green teardrop or two for leaves.
So there you go! Master these simple tear drops and all sorts of designs are open to you!
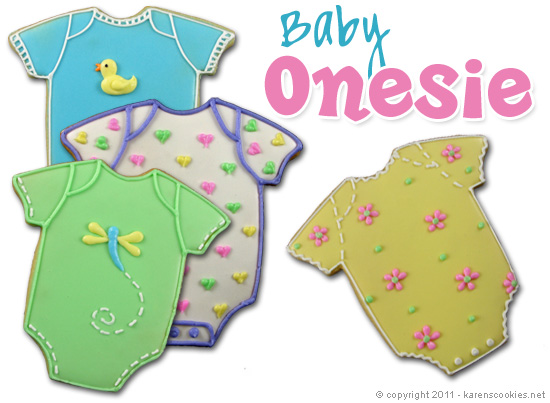
Use the examples of onesie cookies on this page as inspiration or come up
with your own designs.