|
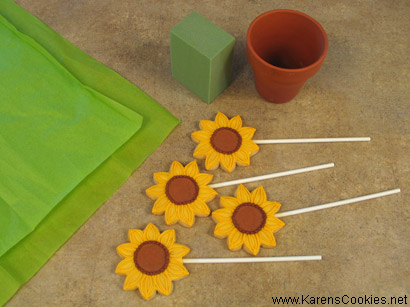
The only supplies you need for most projects are a suitable container, florist's foam (oasis), cookie sticks, and tissue paper in assorted colors. Some optional supplies are large cellophane basket bags and ribbon for packaging. Here are some tips for assembly:
|
1. Find a container that will compliment your cookie design. You can arrange cookie pops in just about any container. Be creative—you can use mugs, boxes, baskets, flower pots, vases, etc. Look for things that will match and add to your cookies. A clay pot will be cute with flowers, but it might not work for motorcycles.
2. Decide how many cookies you would like to put in your chosen container, and bake them as described in the "
Baking Cookie Pops" tutorial. I always bake at least one extra cookie to allow for breakage, or in case I decide I need one more cookie for my arrangement while I'm positioning the cookies. It's frustrating to get done with your arrangement and see a hole in the design that could use one more cookie, but you just don't have it!
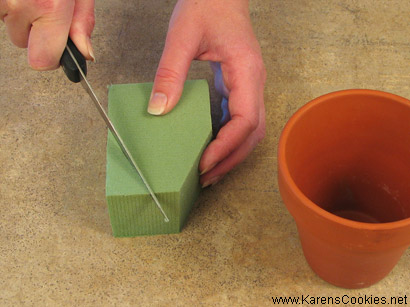
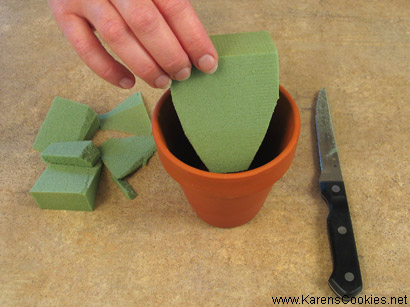
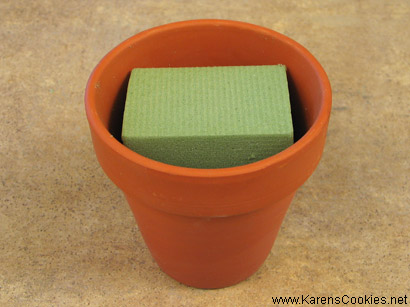
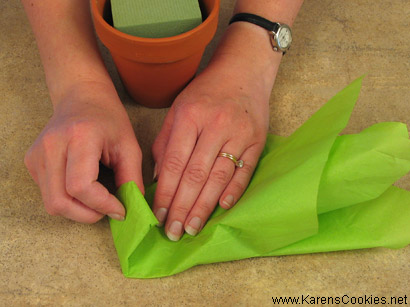
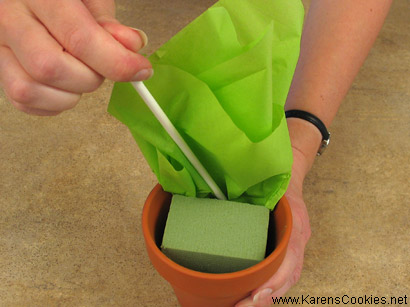
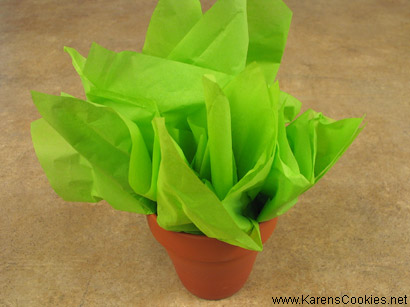
3. Take a piece of florist's foam and cut it to fit your container. I like to cut it smaller than the container so that I will have space on all sides of the oasis for inserting tissue paper. An easy way to accomplish this is by using a square piece of foam for a round container and a round piece for a square container. This will create natural gaps. Insert foam into yourcontainer.
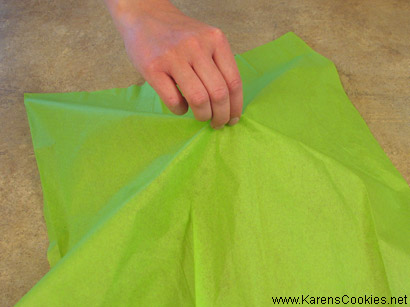
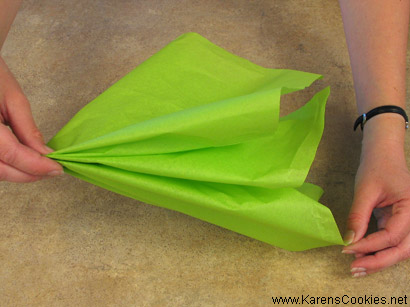
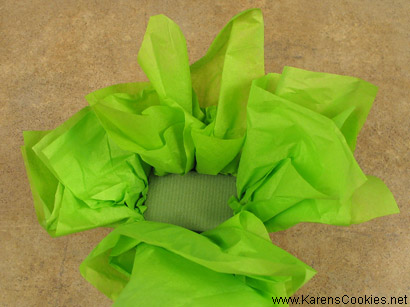
4. Arrange tissue paper to hide the foam and camoflauge the sticks. Choose colors that will compliment your cookies. I've found that an easy way to "fold" tissue paper is to lay it out flat on a table and pick it up from the center with your thumb and forefinger. Pick it up quickly and use your other hand to pull out corners and arrange it as you would like. Fold down the tip of the tissue to make it the desired length. Insert the folded tissue into the gaps between your container and the florists' foam. You can use an extra cookie stick or metal spatula to push the tissue into place. After all tissue has been placed, fluff it up and arrange it how you'd like.
|
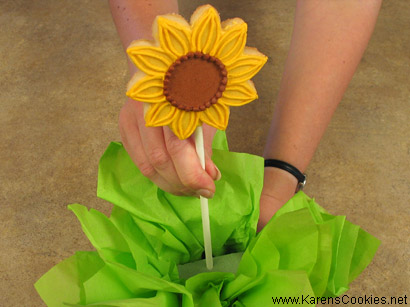
5. Insert cookie pops into the foam. A general rule for arranging is to have the taller cookies in back and the shorter ones toward the front. This can be accomplished by baking your cookies on sticks of different lengths, or by inserting some sticks farther into the foam than others. For example, in this tutorial, all of the cookies were baked on 8" sticks, but I inserted the front two cookies farther into the foam than the back one to give the appearance of graduated heights.
|
|
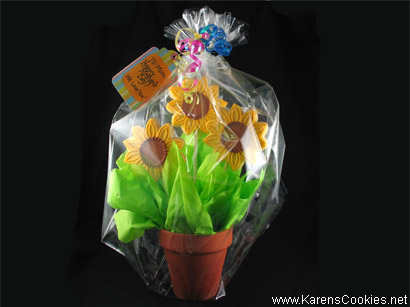
6. Wrap arrangement in a large cellophane basket bag and tie with ribbon to give it a professional look. Add a tag with a personal message, if desired.
|
Note: We have the following Cookie Sticks Available through our online store:
- 11 3/4" Cookie Sticks
- 8" Cookie Sticks
- 6 1/2" Cookie Sticks