This is a fun design to make that uses food coloring markers. These are awesome tools, but these turkeys can be done simply
by piping on designs with icing as well.
Grab a Turkey Cookie Cutter and bake a batch of cookies using the provided recipe or your own.
Make a batch of
Corn Syrup Glaze using our recipe or your favorite.
Divide the glaze equally into four bowls. Color one light brown
(by adding one or two drops of coloring), one dark brown (by adding
several drops of coloring), and one black. The last bowl will be
divided into 3 parts. Color one part yellow, one part
red, and the last part orange.
Fill squeeze bottles* with glaze, placing the
black glaze in a bottle with a coupler, and
remaining colors in standard squeeze
bottles. Fit black bottle with #2 tip. If
glaze does not all fit in your bottles,
cover excess to save for refilling.
* Alternately you may use traditional decorating bags and tips for the corn syrup glaze.
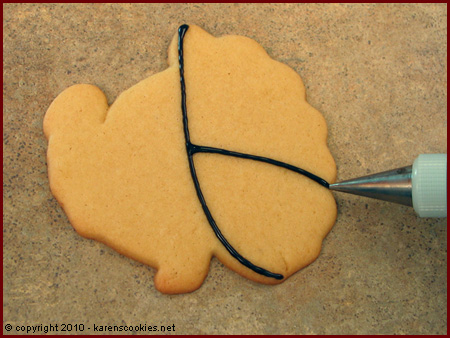
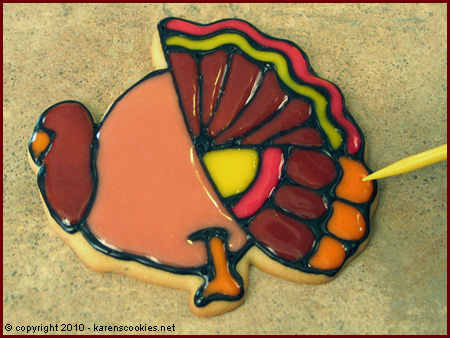
Start outline by piping one long curved line from top to bottom, as shown. Starting from the middle of that line, divide the wing from the tail feathers.

Finish the wing feathers as shown.

Pipe 3 wavy lines following the shape of the outside edge of the tail, leaving about ' inch between the lines. Then pipe a few lines to create individual feathers, as shown.
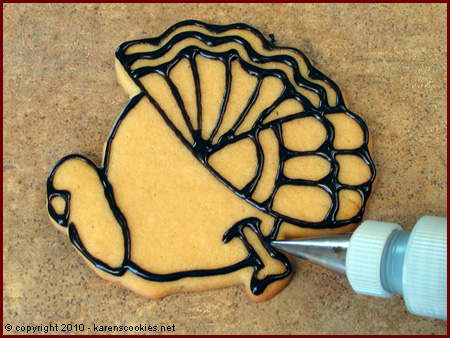
Finish outlining the head, body, and leg of the turkey as shown. Allow to dry for several minutes before continuing to next step.
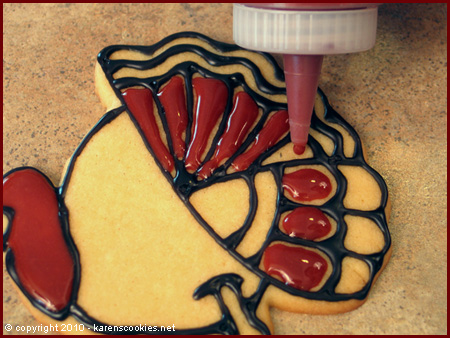
Time to start filling in the sections. The process for each color will be the same. First, use the squeeze bottle to place some glaze in each section...
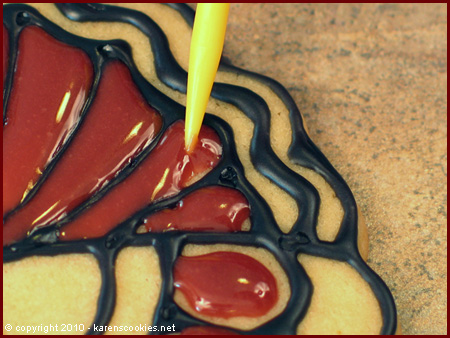
Then use your cookie scraper to push the glaze up to the borders in each section. You may also need to use the scraper to even out the glaze and remove bubbles.
Repeat this process for each color, following the example above, or using whatever color preferences you have. Allow to dry completely before moving on to the final steps.
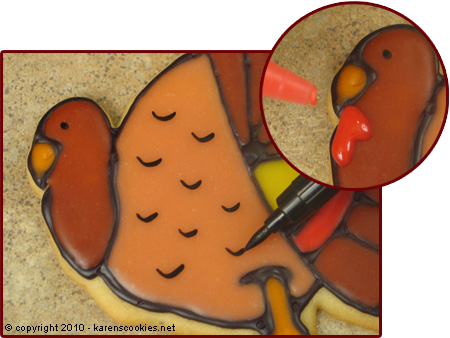
Once the cookie is dry, add ruffle marks and an eye with a black food color marker. Finally use red glaze to add a wattle to the turkey's neck. Allow to dry.
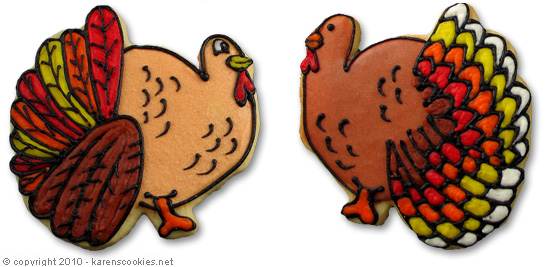
Pictured above are just a couple more designs you can create with this particular turkey cookie cutter. Of course,
there are limitless other techniques you can apply. Get creative and see what you come up with.
Note: Personalization is super easy with the food color marker! Try adding names to your turkeys to use as edible place cards or favors.
Good luck!